Installation of Slackintosh 11.0 on an Apple iBook G4
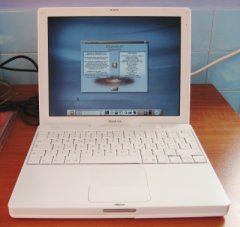
iBook G4 running Slackintosh
Introduction
This howto describes how I installed Slackintosh on my Apple iBook G4 (1GHz). It includes some handy hints I picked up while installing the system. Since I’m not interested in Gnome or KDE, I give also a short description how to install Enlightenment DR0.17 (e17).
What to prepare
First thing to do is to get all the files we need during installation. To get Slackintosh, you must download either 3 iso images for 3 installation CDs or 1 big iso for an installation DVD. The Slackintosh Website mentions a few download locations for the iso images. I only got the first CD image, because the others mainly contain stuff I don’t need. Several other packages of CD 2 and 3 I downloaded as single packages. One more very important thing to mention is a file you need, if you plan to use the Airport Extreme Card in your iBook. The firmware for this card is contained inside the original Apple driver for this computer. You also need this file during installation. Running Mac OS X you can find this file here:
/System/Library/Extensions/AppleAirport2.kext/Contents/MacOS/AppleAirPort2
I used the following commands to download the necessary files:
SERVER="slackintosh.workaround.ch"
wget http://$SERVER/pub/slackintosh/11.0-iso/slackintosh-11.0-install-d1.iso
wget -r -l 1 -nc --cut-dirs=5 -A tgz \
   http://$SERVER/pub/slackintosh/11.0/slackintosh/t/
wget -r -l 1 -nc --cut-dirs=5 -A tgz \
   http://$SERVER/pub/slackintosh/11.0/slackintosh/tcl/
wget -r -l 1 -nc --cut-dirs=5 -A tgz \
   http://$SERVER/pub/slackintosh/11.0/slackintosh/f/
wget -r -l 1 -nc --cut-dirs=5 -A tgz \
   http://$SERVER/pub/slackintosh/11.0/slackintosh/k/
wget http://$SERVER/pub/slackintosh/11.0/mac-fdisk-basics.txt
Now burn the iso file on one CD. Burn another CD with the other files and the AppleAirPort2 file from your Mac OS X installation. Print the mac-fdisk-basics.txt file. It will be very useful, when you partition your harddisk later on.
Booting from Installation CD
If you want to have both, Slackintosh and Mac OS X on your computer, first install Mac OS X. After booting from the Mac OS X installation DVD, launch the disk configuration tool from the first screen and setup your Mac OS X partition. Keep enough space on your hard drive for the linux installation later on. After installing Mac OS X (if you want this), continue with the Linux installation. Switch on your computer with the first Slackintosh CD in the CDROM drive. When you hear the chime, hold down the C key for a while. Then you should see a screen like this:
Slackintosh 11.0 Installation
Welcome to yaboot version 1.3.13
Enter "help" to get some basic usage information
boot:
Simply press Return to boot Linux. Now follow the instructions to select the keyboard layout. Read all the information carefully. Then login as root and continue with partitioning the harddisk.
Partitioning
Now run the following command:
mac-fdisk /dev/hda
Please read the description in mac-fdisk-basics.txt how to create the partitions you need. Keep in mind, that you have to create an “Apple_Bootstrap” partition.
I decided to create the following partitions for my Linux system:
| Name | Mount-point | Size |
|---|---|---|
| root | / | 3.5GB |
| var | /var | 1.0GB |
| tmp | /tmp | 0.6GB |
| swap | 1.5GB | |
| home | /home | 5.5GB |
The sizes you choose may vary due to your needs. Before you create a new partition, always print the actual partition table with the command “P” (uppercase!). This helps you enter the necessary data, when you create a partition. Create new partitions with the command “c” (lowercase!). mac-fdisk will ask you then for the first block, the length and the name of the partition. If you use “swap” as the name for your swap partition, the setup program later seems to recognize this as a swap partition.
As an example here is the output of the “print” command on my system:
root@g4:/home/volker# mac-fdisk /dev/hda
/dev/hda
Command (? for help): P
/dev/hda
        #                  type name                 length   base      ( size )  system
/dev/hda1   Apple_partition_map Apple                    63 @ 1         ( 31.5k)  Partition map
/dev/hda2       Apple_Bootstrap bootstrap              1600 @ 64        (800.0k)  NewWorld bootblock
/dev/hda9            Apple_Free Extra                268736 @ 1664      (131.2M)  Free space
/dev/hda3             Apple_HFS Apple_HFS_Untitled_3 31195136 @ 270400    ( 14.9G)  HFS
/dev/hda8       Apple_UNIX_SVR2 home                11736159 @ 31465536  (  5.6G)  Linux native
/dev/hda10            Apple_HFS Apple_HFS_Datengrab  60336668 @ 43201695  ( 28.8G)  HFS
/dev/hda4       Apple_UNIX_SVR2 root                 7168000 @ 103538363 (  3.4G)  Linux native
/dev/hda5       Apple_UNIX_SVR2 var                  2097152 @ 110706363 (  1.0G)  Linux native
/dev/hda6       Apple_UNIX_SVR2 tmp                  1228800 @ 112803515 (600.0M)  Linux native
/dev/hda7       Apple_UNIX_SVR2 swap                 3177925 @ 114032315 (  1.5G)  Linux swap

Block size=512, Number of Blocks=117210240
DeviceType=0x0, DeviceId=0x0

Command (? for help):
Now write down which partition number is for what! You’ll need this later on. Save the changes with command “w” and leave the program with “q”.
Running Setup
Now run “setup” and complete the following steps:
- Remap your keyboard
- “Swap Space detected”: Select OK, if the displayed information is correct
- “Select Linux Installation Partition”: Select the partition, which should contain the root file system (/)
- “Select other Linux partitions for /etc/fstab”: Set the mount points for the remaining partitions
- Select the installation media. Choose “Install from a Slackintosh CD or DVD” and later “auto detect”
- “Package Series Selection”: I selected all except for “f”, “k”, “kde”, “kdei” and “t”, because I didn’t want to install KDE and didn’t download CD 2 and 3
- “Prompting Mode”: I used “full” because I was to lazy to confirm the installation of packages during setup. You can later simply deinstall unwanted packages. That’s the easier way
- Time for a coffee
- “Next installation CD”: Select “Quit”, if you don’t have other installation CDs
- “Yaboot configuration settings”: OK
- “Yaboot Configuration”: select N and C. Select also X if you also have OS X installed before.
- Skip “Make Bootdisk”
- “Modem Configuration”: choose “/dev/ttyS0”
- Enable Hotplug/UDEV -> Yes”
- Mouse Config -> choose ps2 -> OK
- GPM configuration -> Yes<
- Configure Network -> Yes
- Enter Hostname: g4
- Enter Domain: what.ever
- “Setup IP Adress for ‘g4.what.ever’”: -> DHCP
- Confirm Setup complete -> Yes
- Confirm Startup Services to run: deselect PCMCIA
- Custom screen fonts -> No
- “Hardware Clock Set To UTC?” -> Yes
- Timezone select
- Select default window manager to use -> TWM
- “Warning: No Root Password Detected”: set one!
Press CTRL-ALT-delete (delete is FN+Backspace) to reboot your computer. If everything goes well, you will end up with a prompt like this:
Welcome to Linux 2.6.17.13 (tty1)

g4 login: _
Now login as root.
Both network cards (100 MBit Ehternet and Airport Extreme) are automatically detected when Slackintosh starts up. But the next time you start your iBook the order of the network devices may change. To fix this, edit “/etc/udev/rules.d/network-device.rules”. Remove the ‘#’ sign from the beginning of these two lines:
KERNEL=="eth?", SYSFS{address}=="00:0d:93:11:22:33", NAME="eth0"
KERNEL=="eth?", SYSFS{address}=="00:0d:93:11:22:44", NAME="eth1"
Don’t change anything else! Leave the question marks untouched.
Now create a user account:
useradd -G audio,cdrom,tty -s /bin/sh -m myname
passwd myname
Airport Extreme
The Linux kernel that comes with Slackintosh 11.0 already supports Airport Extreme. The Homepage of the driver contains more details. On initialization, the driver must download the firmware to the Airport Extreme Card. So now you need the driver from your Mac OS X installation. Copy it to “/tmp” and execute:
bcm43xx-fwcutter -w /lib/firmware /tmp/AppleAirPort2
This will extract a couple of firmware files from the driver to “/lib/firmware”. A warning, that the firmware is not usable for 802.11a cards can savely be ignored, because AirportExtreme is 802.11b/g. If you do not have the driver from your Mac OS X installation, have a look at “/usr/doc/fwcutter-*/README” or b43 Linux Wireless.
Now edit “/etc/rc.d/rc.wireless.conf”. I entered this section:
*)
    INFO="Airport Extreme"
    ESSID="any"
    MODE="Managed"
    KEY="0ABEDFEEDCAFE2BABE5BADFACE"
    ;;
This means, I use WEP 128 to connect to my access point. Of course you must use the same WEP key, that is configured in your access point. Refer to the doumentation of “iwconfig” for further configuration options. By executing “iwconfig”, I know my WLAN card is “eth1”. So I also edited “/etc/rc.d/rc.inet1.conf”, because my access point can assign IP numbers via DHCP:
# Config information for eth1:
IPADDR[1]=""
NETMASK[1]=""
USE_DHCP[1]="yes"
DHCP_HOSTNAME[1]="g4"
For eth0 I left all fields blank, because I do not use eth0 (sungem). One more thing to mention: the bcm43xx module doesn’t like the command:
iwconfig key restricted
But, if you use WEP, this will be executed on a standard Slackware installation. So I removed two lines from “/etc/rc.d/rc.wireless”:
# WEP keys (non-WPA)
if [ -n "$KEY" -a ! -n "$WPA" ] ; then
        if [ "$KEY" = "off" ]; then
          echo "$0:  $IWCOMMAND key open" | $LOGGER
          $IWCOMMAND key open
          echo "$0:  $IWCOMMAND key off" | $LOGGER
          $IWCOMMAND key off
        else
<del>          echo "$0:  $IWCOMMAND key restricted" | $LOGGER
          $IWCOMMAND key restricted</del>
          echo "$0:  $IWCOMMAND key ************" | $LOGGER
          $IWCOMMAND key $KEY
        fi
fi
Now everything should be fine. So unload the bcm43xx module and load it again. Then check, if everything was going well:
rmmod bcm43xx
modprobe bcm43xx
dmesg
iwconfig
Try to execute:
iwlist eth1 scan
This should list your access point (if ESSID broadcast isn’t switched off). Execute “ifconfig -a” to see if the WLAN interface is configured correctly.
b43 and b43legacy has useful information about wireless Linux drivers.
ALSA
To configure the ALSA System someone usually runs “alsaconf”. But alsaconf failed to detect a soundcard on my iBook. So I created the file “/etc/modprobe.d/alsa” manually with the following content:
alias char-major-116 snd
alias char-major-14 soundcore
alias snd-card-0 snd-powermac
alias sound-slot-0 snd-card-0
alias sound-service-0-0 snd-mixer-oss
alias sound-service-0-1 snd-seq-oss
alias sound-service-0-3 snd-pcm-oss
alias sound-service-0-8 snd-seq-oss
alias sound-service-0-12 snd-pcm-oss
alias /dev/mixer snd-mixer-oss
alias /dev/dsp snd-pcm-oss
alias /dev/midi snd-seq-oss
options snd cards_limit=1
Because sometimes more than one application likes to access the sound device, I created a “.asoundrc” in my homedirectory. This ensures that the default sound device is a software mixer and all the output is merged. Here is the contents of this file:
pcm.!default {
   type plug
   slave.pcm "dmixer"
}

pcm.dmixer {
   type dmix
   ipc_key 1024
   slave {
      pcm "hw:0,0"
      period_time 0
      period_size 1024
      buffer_size 4096
      rate 44100
   }
   bindings {
      0 0
      1 1
   }
}

ctl.dmixer {
   type hw
   card 0
}
Now start alsa by executing:
/etc/rc.d/rc.alsa
Now you should change the mixer settings to useful default values. This is done by running:
alsamixer
To save these settings run:
alsactl store
So next time you boot your computer, these setting will be restored.
pbbuttonsd
The pbbuttonsd package that comes with Slackintosh 11.0 partially doesn’t work. The pbbuttonsd daemon works correct, but it cannot execute the scripts in “/etc/power/scripts.d/” because the run-parts script coming with Slackware/Slackintosh doesn’t support the “–arg” parameter.
Update:
If you upgrade your “bin”-package with the one in the patches/packages directory then “run-parts” will support the “–arg” parameter.
But /etc/power/pmcs-pbbuttonsd relies on this. To fix this, I’ve made a pbbuttonsd package that contains a modified run-parts script, which is used by pbbuttonsd. Download the newest package and upgrade the already installed pbbuttonsd. But before you upgrade the package, make sure to stop pbbuttonsd, if it is already running.
/etc/rc.d/rc.pbbuttonsd stop
upgradepkg /tmp/pbbuttonsd-*-powerpc-*.tgz
Now you are ready to configure pbbuttonsd and also use the scripts in “/etc/power”
First I adjusted the harddisk settings. When the notebook is battery powered, the harddisk can spin down automatically after some time of inactivity. In “/etc/power/pmcs-config” I changed:
powersave_HDTimeOff=480
in “/etc/power/scripts.d/laptopmode.sh” I adapted the following settings:
DO_REMOUNTS=1
DO_REMOUNT_NOATIME=1
MAX_AGE=3600
DIRTY_RATIO=50
DIRTY_BACKGROUND_RATIO=5
READAHEAD=8192
Refer to the documentation in “laptopmode.sh” to find out, what this means. If you have the kernel sources installed, you can find more information about this in “/usr/src/linux/Documentation/laptop-mode.txt”. Please also make sure that the third column in “/etc/fstab” is “ext3” and not “auto” for the partitions, that contain ext3 filesystems. This ensures “laptopmode.sh” is working properly.
Now have a look at “/etc/pbbuttonsd.conf”. Adapt it to your needs. I only changed “NoTapTyping” to “yes”. Use “showkey” to determine keycodes. For G4 notebooks, all the key setting are already OK, but for older laptops, you might need to change the settings.
Now start pbbuttonsd again:
/etc/rc.d/rc.pbbuttonsd start
The missing mouse buttons
One big disadvantage of the Apple Computers is the missing middle and right mouse buttons. But you can use some other buttons as mouse buttons. Again use showkeys to find out about the keys you choosed. In my case, I created a “/etc/sysctl.conf” with the following contents:
dev.mac_hid.mouse_button3_keycode = 96
dev.mac_hid.mouse_button2_keycode = 125
dev.mac_hid.mouse_button_emulation = 1
You may find some other keys more convenient.
Thermostat module
Before we continue with some CPU intensive things, we should make sure that the cooling fan works correctly. iBook G4 and Powerbook G4 (need ?) the driver for ADT746x thermostat. So I loaded the “therm_adt746x” module and added the following line to “/etc/rc.d/rc.modules”:
# ADT746x thermostat in iBook G4/Powerbook G4
/sbin/modprobe therm_adt746x
CPU frequency
The iBook G4 is able to switch the CPU frequency to 2 different values. Switching the CPU to a low frequency helps to save power thus extending battery run-time. pbbuttonsd can assist here. There is a small script in “/etc/power/scripts.d” called “cpufreq”. A simple link will activate this script:
cd /etc/power/event.d
ln -s ../scripts.d/cpufreq .
Now plug in/out the ac and watch the CPU frequency changing by executing:
cat /sys/devices/system/cpu/cpu0/cpufreq/cpuinfo_cur_freq
But this didn’t satisfy me, because I cannot have full CPU speed in battery powered mode, if needed. Also the CPU is cooking in ac mode even though I might not need the high speed. So better stop pbbuttonsd again from taking care of this:
rm /etc/power/event.d/cpufreq
What I really wanted is a daemon taking care of CPU usage and dynamically switching CPU frequency. One that seems to be capable of this is PowerNowd. So get a PowerNowd Slackintosh package from this directory. Install the package and start the daemon:
installpkg /tmp/powernowd-0.97-powerpc-2ttc.tgz
/etc/rc.d/rc.powernowd start
If you want to change the options “powernowd” is executed with, have a look at “/etc/rc.d/rc.powernowd.conf”. More information about CPU frequency switching can be found here:
/usr/src/linux/Documentation/cpu-freq/user-guide.txt
X11
Setting up X11 on the iBook was quite easy. I only called “xorgsetup” and choosed the following options:
- 24 col
- generic 105-key (Intl) PC
- de
- nodeadkeys
- none - Do not select an additional layout
This created a new “/etc/X11/xorg.conf” which was directly usable. Of course your settings for the keyboard layout may be different. To verify, if X is able to start, login as normal user and run “startx”.
Enlightenment e17
I want to use e17 on my iBook. So far there are no releases, so I had to get the sources from cvs and compile it myself:
# checkout e17 from cvs
cvs -d:pserver:anonymous@anoncvs.enlightenment.org:/var/cvs/e login
cvs -z3 -d:pserver:anonymous@anoncvs.enlightenment.org:/var/cvs/e co e17
cd e17
# first become root!
su
# now let's compile necessary and useful things
MODULES="libs/eet libs/edb libs/evas \
   libs/ecore libs/efreet libs/embryo libs/edje \
   libs/imlib2 libs/imlib2_loaders libs/epeg \
   libs/epsilon libs/esmart \
   libs/emotion libs/ewl \
   libs/etk \
   apps/entrance apps/e \
   apps/e_utils apps/eclair \
   apps/entice apps/elicit \
   apps/imlib2_tools \
   proto/ephoto"
set -e
for I in $MODULES ; do
  pushd $I
  ./autogen.sh
  make
  make install
  ldconfig
  popd
done
exit
Update:
I’ve made Slackintosh Packages for Enlightenment. The easiest way to install these is to use slapt-get. Simply add the following line to your “/etc/slapt-get/slapt-getrc”:
SOURCE=http://tintuc.no-ip.com/linux/slackintoshpkg/11.0/pkg/
Then just execute the following commands:
slapt-get --update
slapt-get --install enlightenment
If you want to try the “Entrance” login manager, also do:
slapt-get --install entrance
The next time you change the runlevel to 4, the Entrance login manager will be used.
Not yet installed slapt-get? Then just install the Slackintosh slapt-get package using installpkg. Then change the “SOURCE” line in “/etc/slapt-get/slapt-getrc” to:
SOURCE=http://slackintosh.workaround.ch/pub/slackintosh/11.0/
After I successfully built and installed e17, I changed “/etc/rc.d/rc.4” so that the “entrance” session manager gets used by adding a few lines:
# Tell the viewers what's going to happen...
echo "Starting up X11 session manager..."

<ins># Try to use Entrance session manager:
if [ -x /usr/local/sbin/entranced ]; then
exec /usr/local/sbin/entranced -nodaemon
fi</ins>

# Try to use GNOME's gdm session manager:
if [ -x /usr/bin/gdm ]; then
exec /usr/bin/gdm -nodaemon
fi
In my users home directory I created a “.xprofile” with the following contents:
exec /usr/bin/gtkpbbuttons -t Crystal &
exec /usr/bin/gkrellm &
exec /usr/local/bin/enlightenment_start
these lines will be executed by the X11 session manager after successfully logging in.
On Slackware, X is executed at runlevel 4. To make the computer booting into runlevel 4, I changed the default runlevel in “/etc/inittab”:
id:4:initdefault:
To enter runlevel 4 without rebooting, enter “telinit 4”. Now you should see the “Entrance” session manager. Select the default tab to enable the execution of your “.xprofile”, when you login.